Light metering can be confusing. But it doesn’t have to be. In fact, a lot of the mumbo jumbo surrounding lighting and metering is simply unnecessary.
In true “Gina-style”, this episode Gina and Valerie focus on simple explanations about light metering that will improve your photography, help you achieve perfect skin tones and provide you with the knowledge you need to really master your metering. You also get to find out why “Hans” loves “50 Shades of Grey”.
#ginachallenge #50shadesofgrey
Click play to listen to the podcast or find it on iTunes here. If you don’t use iTunes you can get the feed here, or listen to us on Stitcher radio.
Show notes
Following on from last week’s #ginachallenge #cliche, here are a few shoutouts to our Cliche Champions.
Listener Question
from Jessica Roberts-Booton
I just want to say, “Thank you, thank you!” I have learned so much listening to your podcast. I have always been interested in photography, but finally am being able to really dive in and learn. My husband and I have eight children, so time to shoot is limited and they are my main subjects. I shot these photos of my daughter trying to use the composition rules. I would love some feed back. I really haven’t processed them a lot. I am just starting to learn my way around Lightroom and Photoshop.


Above: By Jessica Roberts-Booton
Listener questions about exposure from Jessica Roberts-Booton, Doug Smith, Rob Morris, and Fran Solly:
“Quick question on the podcast – Several times Gina Milicia has said that she will meter the face of the subject in regards to lighting. Are you talking about a hand held meter or on the camera. Like using spot metering?”
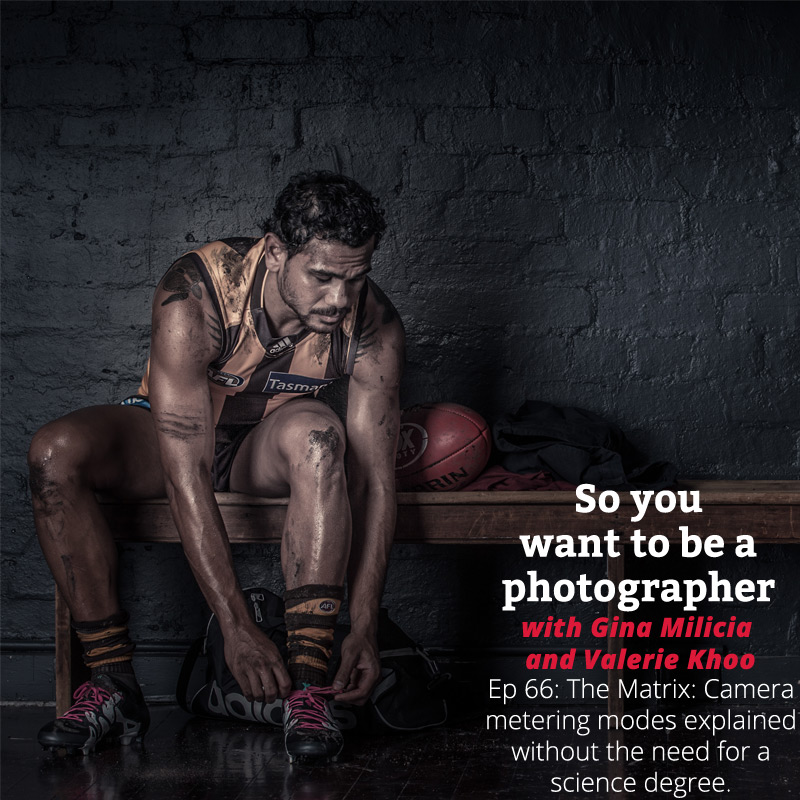
The Matrix: Camera metering modes explained without the need for a science degree
Light reflected vs actual light.
The most accurate way to meter is with a light metre.
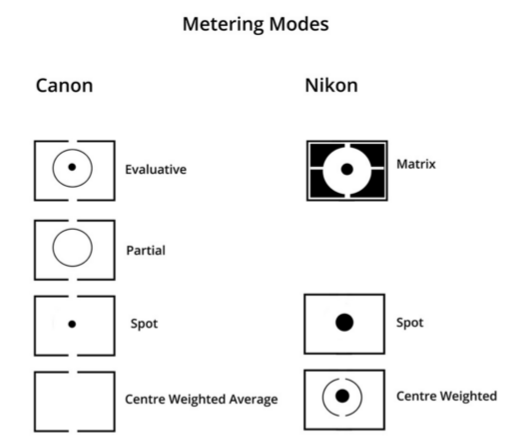
1. Centre weighted metering
Centre weighted metering measures the light from the whole scene but places more emphasis on the centre.
This is a good mode to use for portraits as it reads the area around the centre of the frame, right where your portrait subject will be. Centre weighted metering also compensates for brightly lit backgrounds.
2. Spot metering
Spot metering takes a single reading from a small area in the centre of the frame. This is a good mode if you need to get an accurate light reading from a small area on a brightly lit plane, like a backlit couple walking in the distance and many photographers love using it for portraits because it allows you to accurately meter off skintones.
The problem with spot is it measures such a tiny area that if you misplace your spot in a very bright area like the veil on a wedding dress or a dark mole on someone’s face, the exposure will vary drastically.
3. Matrix metering or evaluative (the default setting on all cameras)
Matrix metering divides your image into segments and takes a reading based on the average of brightest to darkest. This is a good all rounder to choose and I use matrix metering as a starting point for my daylight shoots.
This is the default setting on all of my shoots because it allows me to get an average reading of the background
50 shades of grey
The camera is colourblind.
Default setting of all camera metering systems is the Matrix or Evaluative system.

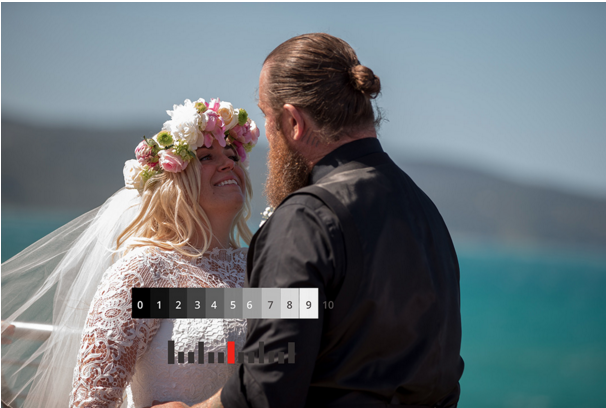
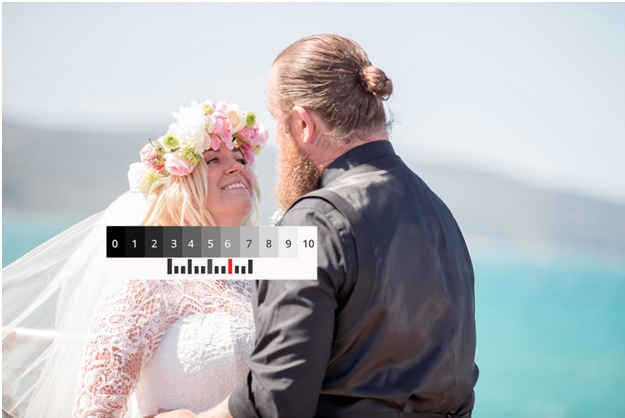
This image and the following images were shot at my friends Lou and Mick Wedding.
Louise Petch is one of my fav stylists. You can check out her work here.
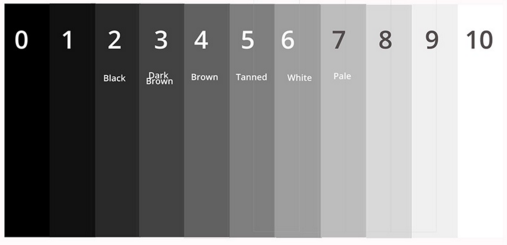
If you took all the skin tones in the world and blended them together, you would probably get an average of mid-suntanned skin.
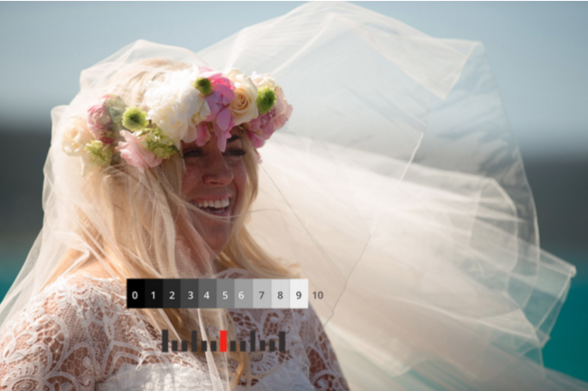
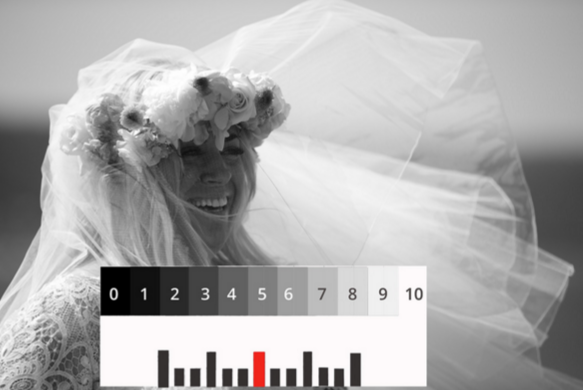
Above: Skin tones based on Hans’ 50 shades of grey formula. This is a correct exposure according to the camera’s meter but the skin tone looks too dark. This is because my friend Lou has fair to light skin and Hans assumes that everyone has tanned skin.
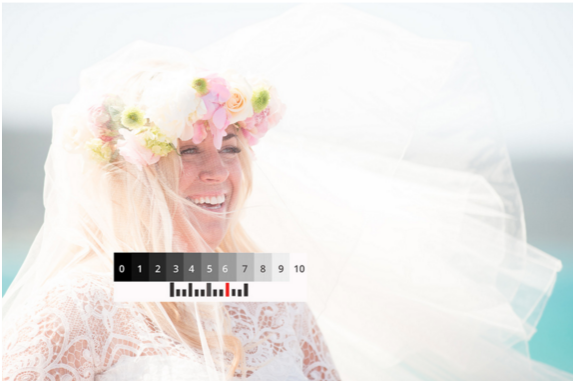
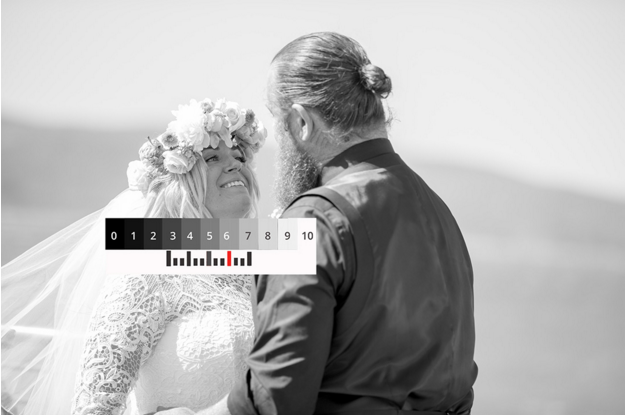
Above: When I adjust my setting and overexpose the image by 1 stop, her skin tone starts to look more realistic.
Metering off the skin
This can be a little confusing because the same points the camera uses to focus are also being used to take meter readings.
At this stage I’m not focusing my image, I’m taking a light reading. Once I’ve established my skin tone, I will set my exposure and go back and focus on the eyes of my model.
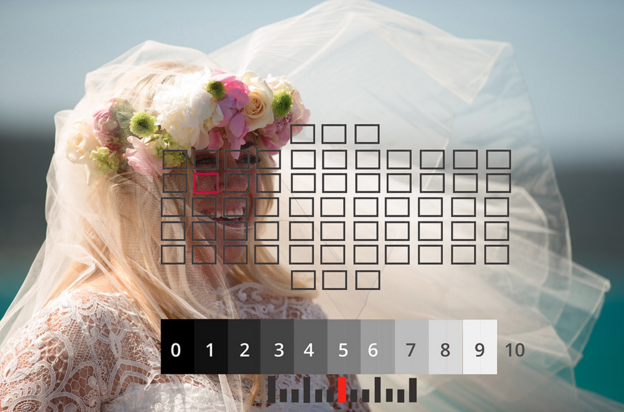
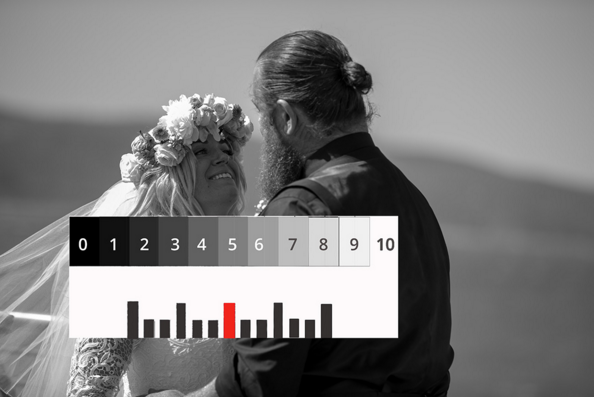
Above: When my camera is set to Matrix or evaluative metering and I take a reading off the skin tone the camera will give me a correct exposure based on my models skin being mid grey. Notice how the image is well exposed and I have detail in the whites.
The problem with this average setting is my models skin is not average. It’s pale, white skin so I need to compensate for this and give my image a brighter exposure by adjusting my aperture or shutter speed or ISO until my camera meter is at +1 stops.
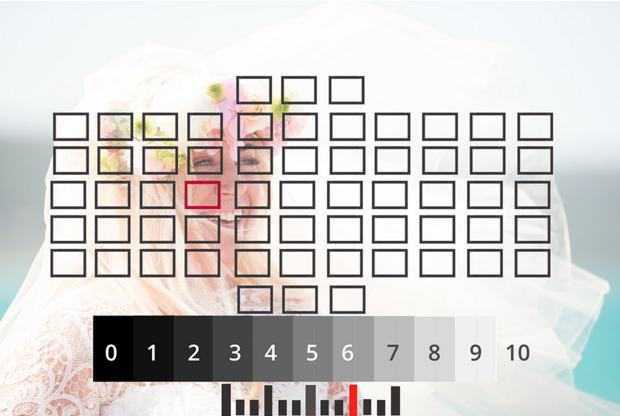
Above: Here is an example of my model that has been overexposed by 1 stop. The skintone is now a more accurate reflection of what my model really looks like.
When I’m photographing most skintones I find they look better overexposed by ½ to one stop.
Darker skin tones will be automatically over exposed by the camera meter.
The camera’s meter will average black skin to mid grey, which is too light so you will need to compensate by under exposing the skin by ½ to 1 stop.
If you are shooting in auto mode trying bracketing +1 stop -1 stop.
If you want to nail the perfect skin tone every time, get a light meter.
#ginachallenge #50shadesofgrey

