Great photography is not just about the lighting, posing and technicalities of the camera. It’s also about the cropping. A well cropped photo can make the difference between a good image – and a great one.
So what do you need to know about cropping to ensure that your pictures are great?
Gina and Valerie discuss everything you need to know about cropping – including why it’s important to crop “in camera”, when to do so in post-production, Gina’s golden rules of cropping, how to crop with confidence and how to ensure that you get the balance right in all your shots.
#ginachallenge #goodcropbadcrop
Click play to listen to the podcast or find it on iTunes here. If you don’t use iTunes you can get the feed here, or listen to us on Stitcher radio.
Show notes
Useful link:
6 Photographers Capture Same Person But Results Vary Widely Because of a Twist (VIDEO)
Join our Facebook group:
Search for “So you want to be a photographer podcast community” on Facebook. Request to join and we’ll let you in! Or here’s the direct link.
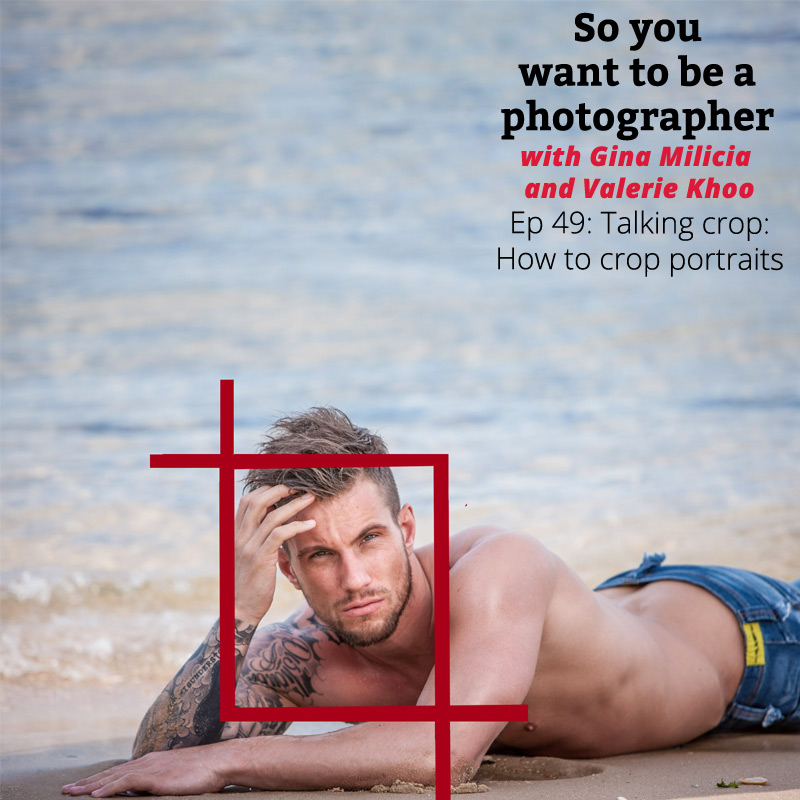
Talking crop: How to crop portraits

Does it matter where you crop a portrait?
I will crop a shot below the knee, mid-thigh, at the waist, across forearm, or through top of head. If I’m going to crop through my model’s waist I will usually ask my model to bring their arms up so I don’t have to crop through their arms.
I try to avoid cropping at any of the joints of the body. This includes fingers, toes, elbows, knees and wrists.I also think cropping through the model’s chin looks odd.
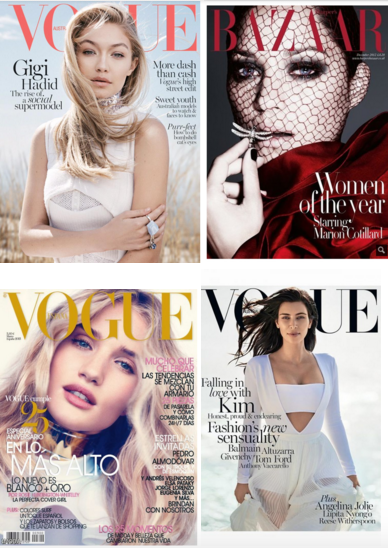
Cropping has changed a lot over the years.
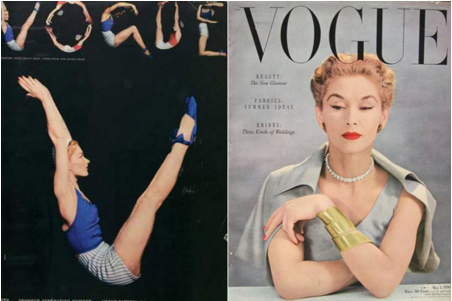
1940’s Vogue cover has a very loose crop
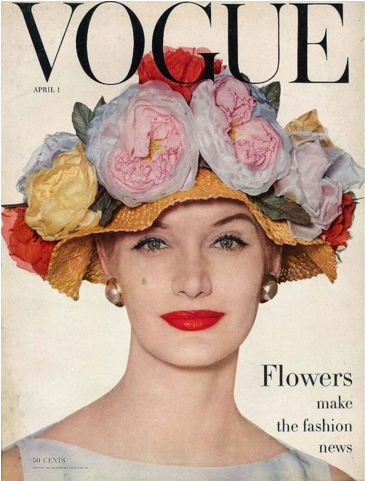
1956 Vogue cover with eyes in the centre of frame
Source: Huffington Post
It took me many years of trial and error and studying the work of my favourite photographers to learn that there are actually a few golden rules of cropping worth following that make a huge difference to the visual impact my portraits make and how flattering these portraits can be.
My shooting, lighting, posing and post production style has developed and evolved over the years but the way I crop my images has remained the same.
1. Crop in camera
“There is no better time to crop a bad composition than just before you press the shutter release.” – Bryan Peterson

Cropping “in camera” basically means you compose your image exactly how you want your final crop to look when you are taking the photo rather than shooting loosely and cropping the shot in post production.
There are two reasons for this:
1. Images cropped in camera look totally different to images that are cropped in post production. Filling the frame and cropping tight means that you which will create great background blur (bokeh) which removes any background distractions and focuses more attention on your model which is always a good thing.
2.The other advantage of cropping in camera is your file size is not affected. A loosely photographed cropped image may only leave you with 20-30% of your file size so a file that was originally 30MB as a full size image is reduced to 9MB with a tight crop. Lower resolution images have less detail and won’t be as sharp as a full size image
2. Watch where you crop
As a general rule I crop in a way that will elongate and flatter the body.
Cropping at the knees, waist, elbows, toes, fingers, ankles or wrists can make your model look stumpy.
Cropping off the arms or legs can make your model look square or larger than they really are
3. Rule of Thirds
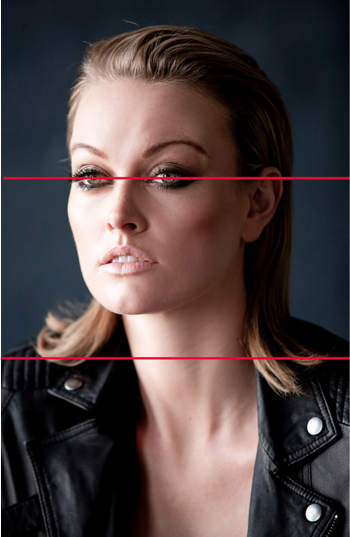
I try and crop so the eyes are in the top third of the frame
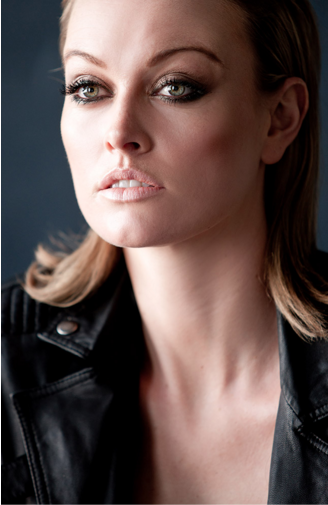
Leave lots of space under the chin will give the illusion of a longer neck and creates are more visually appealing image
I find my portraits look much stronger visually when the eyes are positioned in the top third of the frame.
Cropping into the chin is visually jarring in the same way that vegemite flavoured chocolate is jarring to my tastebuds
4. Give your clients options
- Explosion of social media means we need to shoot more options.
- Shoot both vertical and horizontal
- Fill left hand or right hand side of frame.
- Allow space for text
- Consider FB, Instagram etc. formats
- Leave room above the head in case you get a cover
- Crop a few “in camera”
- You never know where the final image may end up in a few weeks or a few years
5. Crop with confidence!
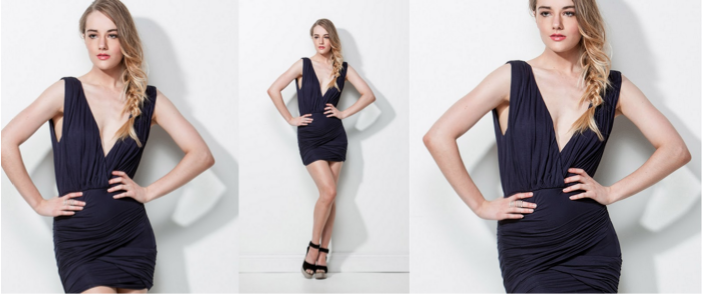
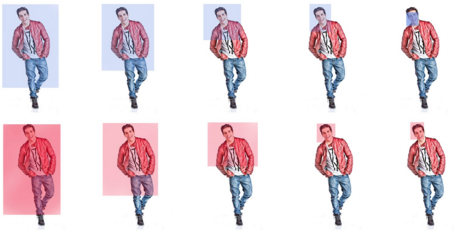
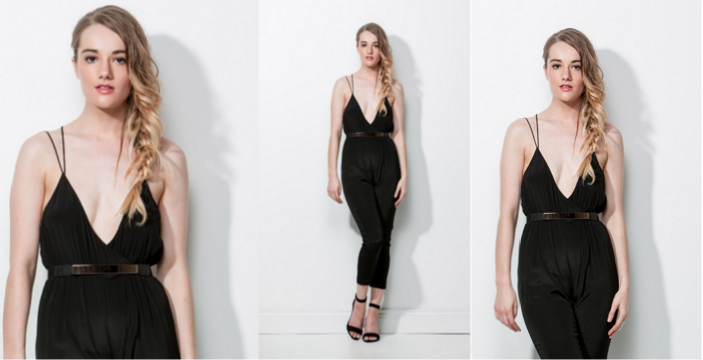
The image on the far left is showing just a bit of skin from the thighs and looks like a mistake. It’s also just cropping into the head and elbow which also looks a bit sloppy. In the image far right I’ve deliberately cropped into the forehead and eliminated the skin below the line of the skirt which looked really sloppy.
Use these suggestions as a starting point and find a style that works for you.
Start with a full length portrait and first try cropping using traditional cropping rules then try breaking the rules and see which way you prefer the most.
Every model you shoot will be slightly different so don’t be afraid to experiment
Ask yourself: “Does this crop look deliberate or does it look like a mistake?”
Watch out for anything jarring like the example above which shows skin below the line of the skirt. This makes the crop look untidy or like a mistake.
I use the same rules for my landscape and lifestyle images. I want my images to flow naturally and avoid anything that may look visually jarring.

Here is an image I photographed at dawn in Venice last year.
The uncropped image looks a little sloppy in composition

A bad crop shows the horizon in the centre of frame and I’ve cropped into the gondolas. There is too much going on in the frame

A good crop has the horizon line in the top third of the frame. Now my image is visually more pleasing to look at and there are fewer distractions on the right side of the frame.

#GinaChallenge #goodcropbadcrop


[…] For a much more detailed discussion on cropping, Gina Milicia has a really helpful podcast episode on the subject which you can listen to HERE. […]