This episode is all about how to get of auto and master manual mode forever. If you’ve been scared to embrace manual mode fully, or you’re still relying on “aperture priority” or “shutter priority”, discover how these functions all relate to each other so that you can capture the kind of shots you’ve always wanted.
Gina and Valerie hope you enjoy the podcast.
Sign up to the newsletter for great tips and free Lightroom presets.
Join the dynamic Gold Membership in our Community which delivers monthly tutorials, live mastermind and lots of behind the scenes videos into the creative process.
Connect with us on Instagram @valeriekhoo @ginamilicia
Click play to listen to the podcast or find it on iTunes here. If you don’t use iTunes you can get the feed here, or listen to us on Stitcher radio.
How to confidently take control of your camera’s manual mode to create the look you want.
1. Why shoot in manual mode

The camera has no way of knowing what your intention is or allows for any creative input. Auto modes are designed to give the best average, not necessarily the best outcome.
When you shoot in Manual you control every step of the creative process.
2. What all the buttons mean
Green square = Auto
P = Program
A = Aperture Priority (AV in Canons)
S = Shutter Priority (TV in Canons)
M = Manual Mode
A = Auto (self explanatory)
But you end with an image based on the predetermined formula developed by “Hans”.
P = Program Mode
The camera selects focus, aperture, shutter speed and you get to select the ISO
A or AV = Aperture Priority Mode
Like riding a bike with the training wheels still on. Popular mode. Used by many enthusiasts and many pro photographers. You set the aperture (the f-stop) and also the ISO. The camera will then set a shutter speed so the image is correctly exposed. It’s easy to use and makes you feel like you have creative control.
S or TV = Shutter Priority Mode
You decide the Shutterspeed and the camera will select the Fstop and ISO
M = Manual Mode
Here, you are in the driver’s seat and control everything.
3. Aperture/ISO and shutter speed simplified (Gina Style)
Aperture:

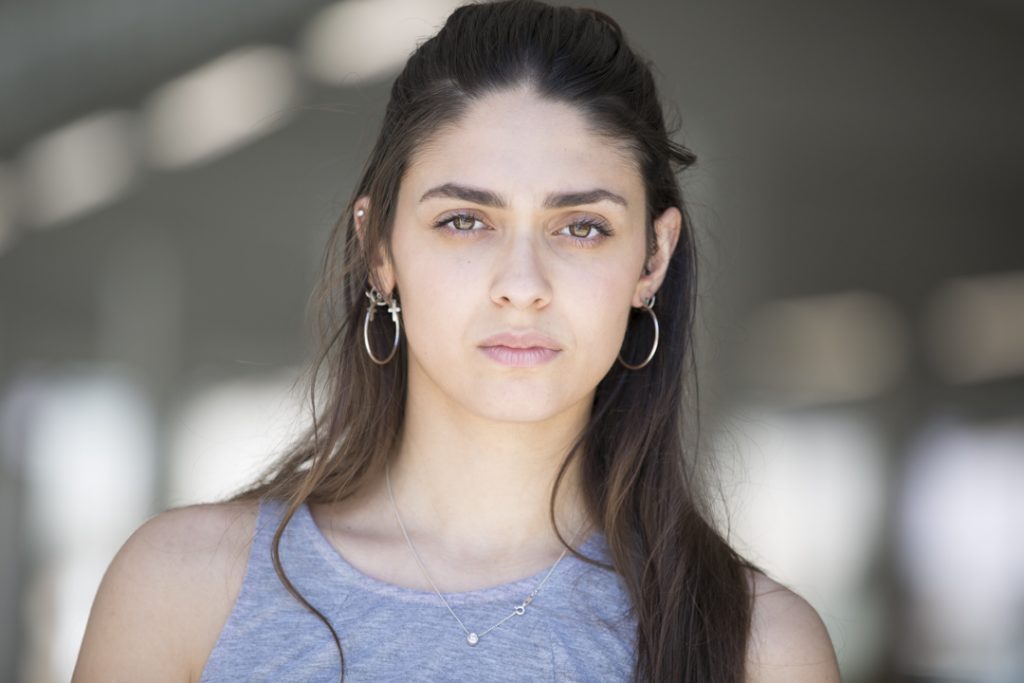
Aperture controls how much of your image is going to be blurry or sharp
Select your f stop or aperture based on how you want your shot to look.
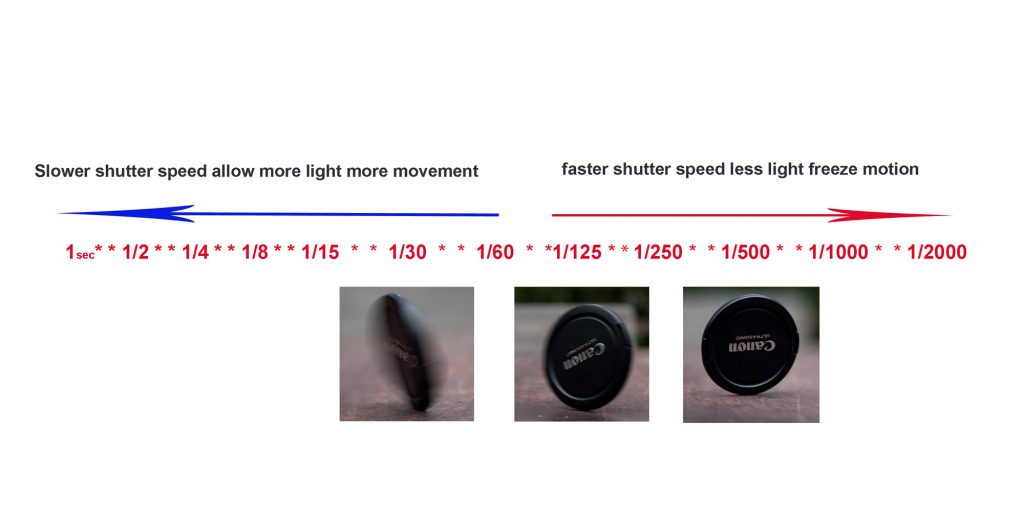
Shutter Speed (How long the shutter remains open)
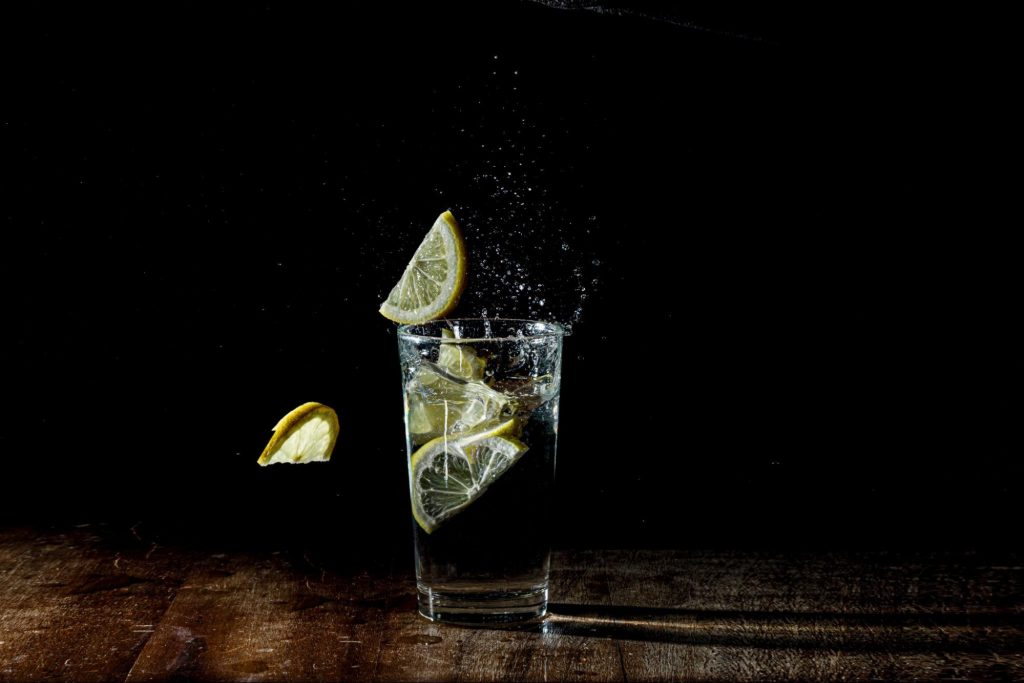
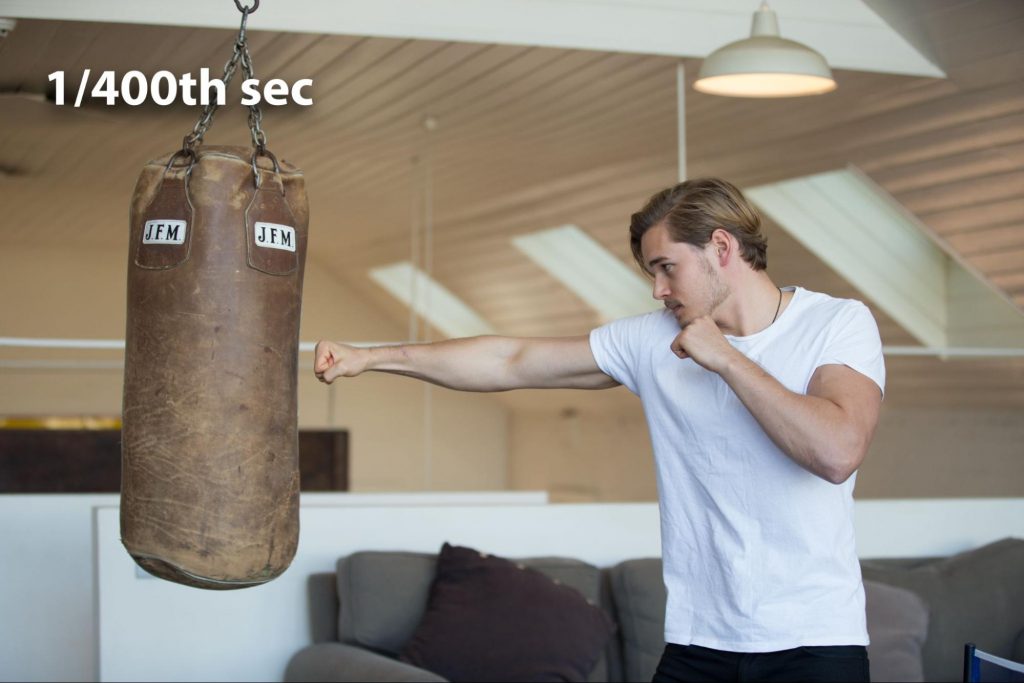
Fast shutter speed freezes action (like sport, kids running around, people dancing, water splashes)

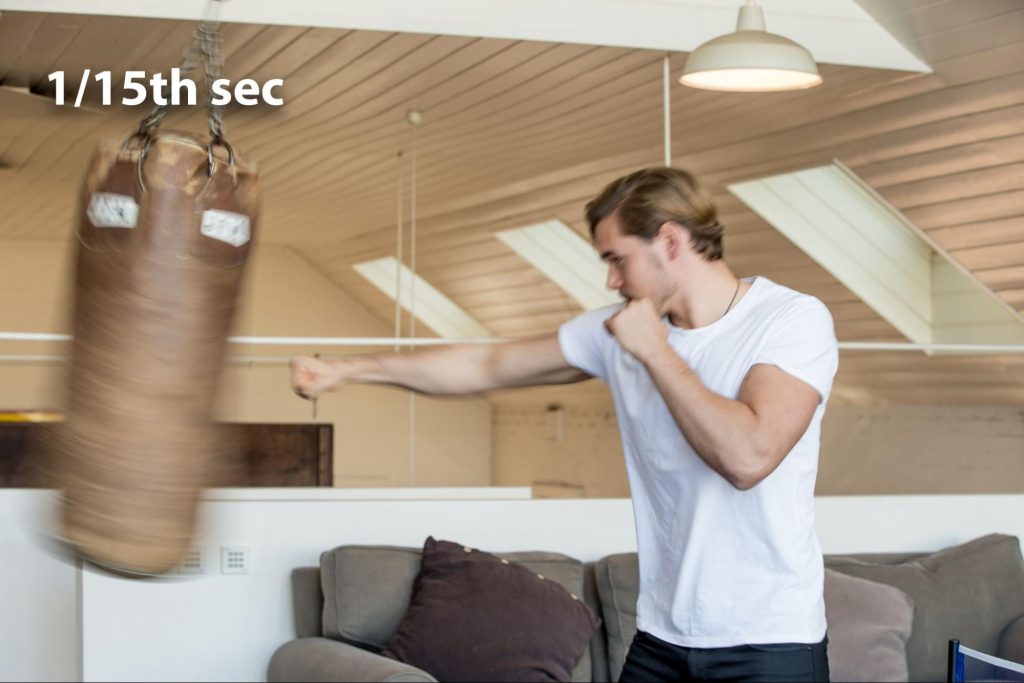
Slow shutter speed is great for things like landscapes with running water, the slow shutter speed will give a silky appearance to the water.
ISO How sensitive to light your file (your image) will be
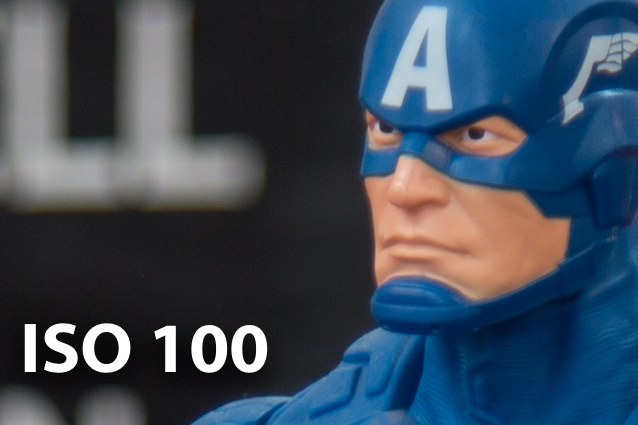
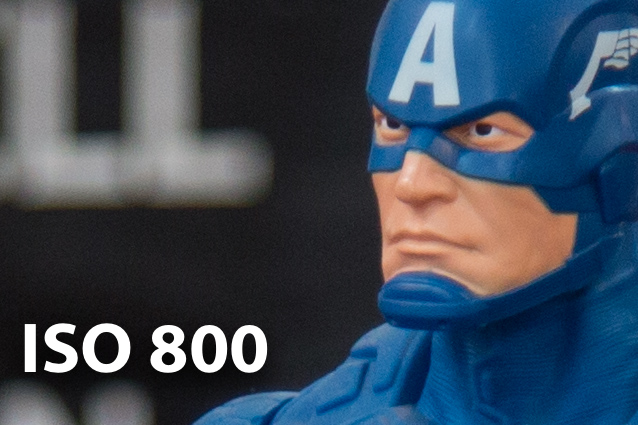
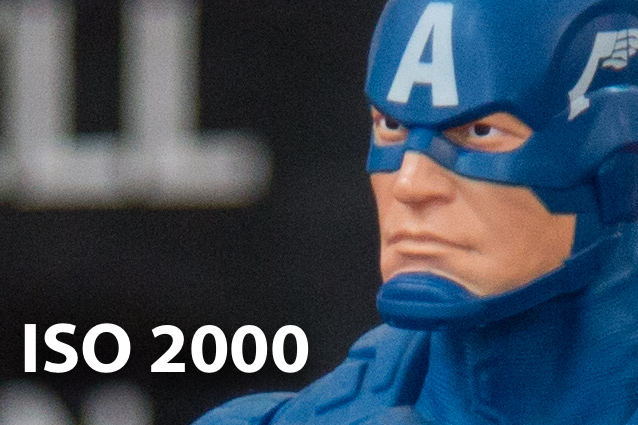
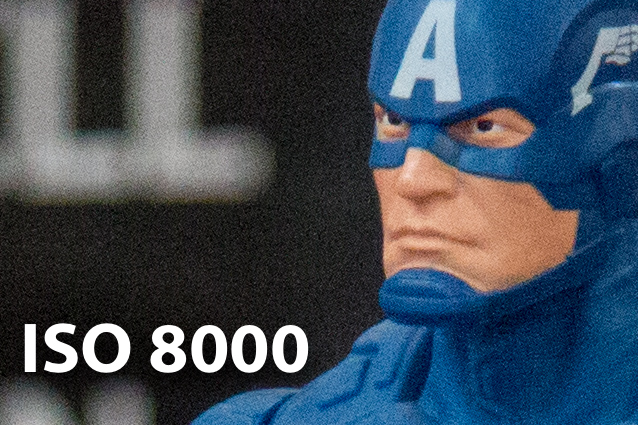
The higher the ISO number the more light-sensitive your file.
But note that the higher the ISO the grainier or more noise in the image so be conservative.
Cheatsheet:
Daylight: ISO 100-400
Night: ISO 400-1600
Extreme low light situations: ISO 1600 and higher
Now let’s bring it all together!
Step 1. Select ISO based on how much light is available
Step 2. Select Aperture based on how you want your image to look
Step 3. Select shutter speed based on whether you want to freeze motion or show movement.
Step 4: Use your camera’s meter to help you get a correct reading and adjust your shutter speed until you have the correct setting.